12. VRM Portal
12.1. VRM Portal introduction
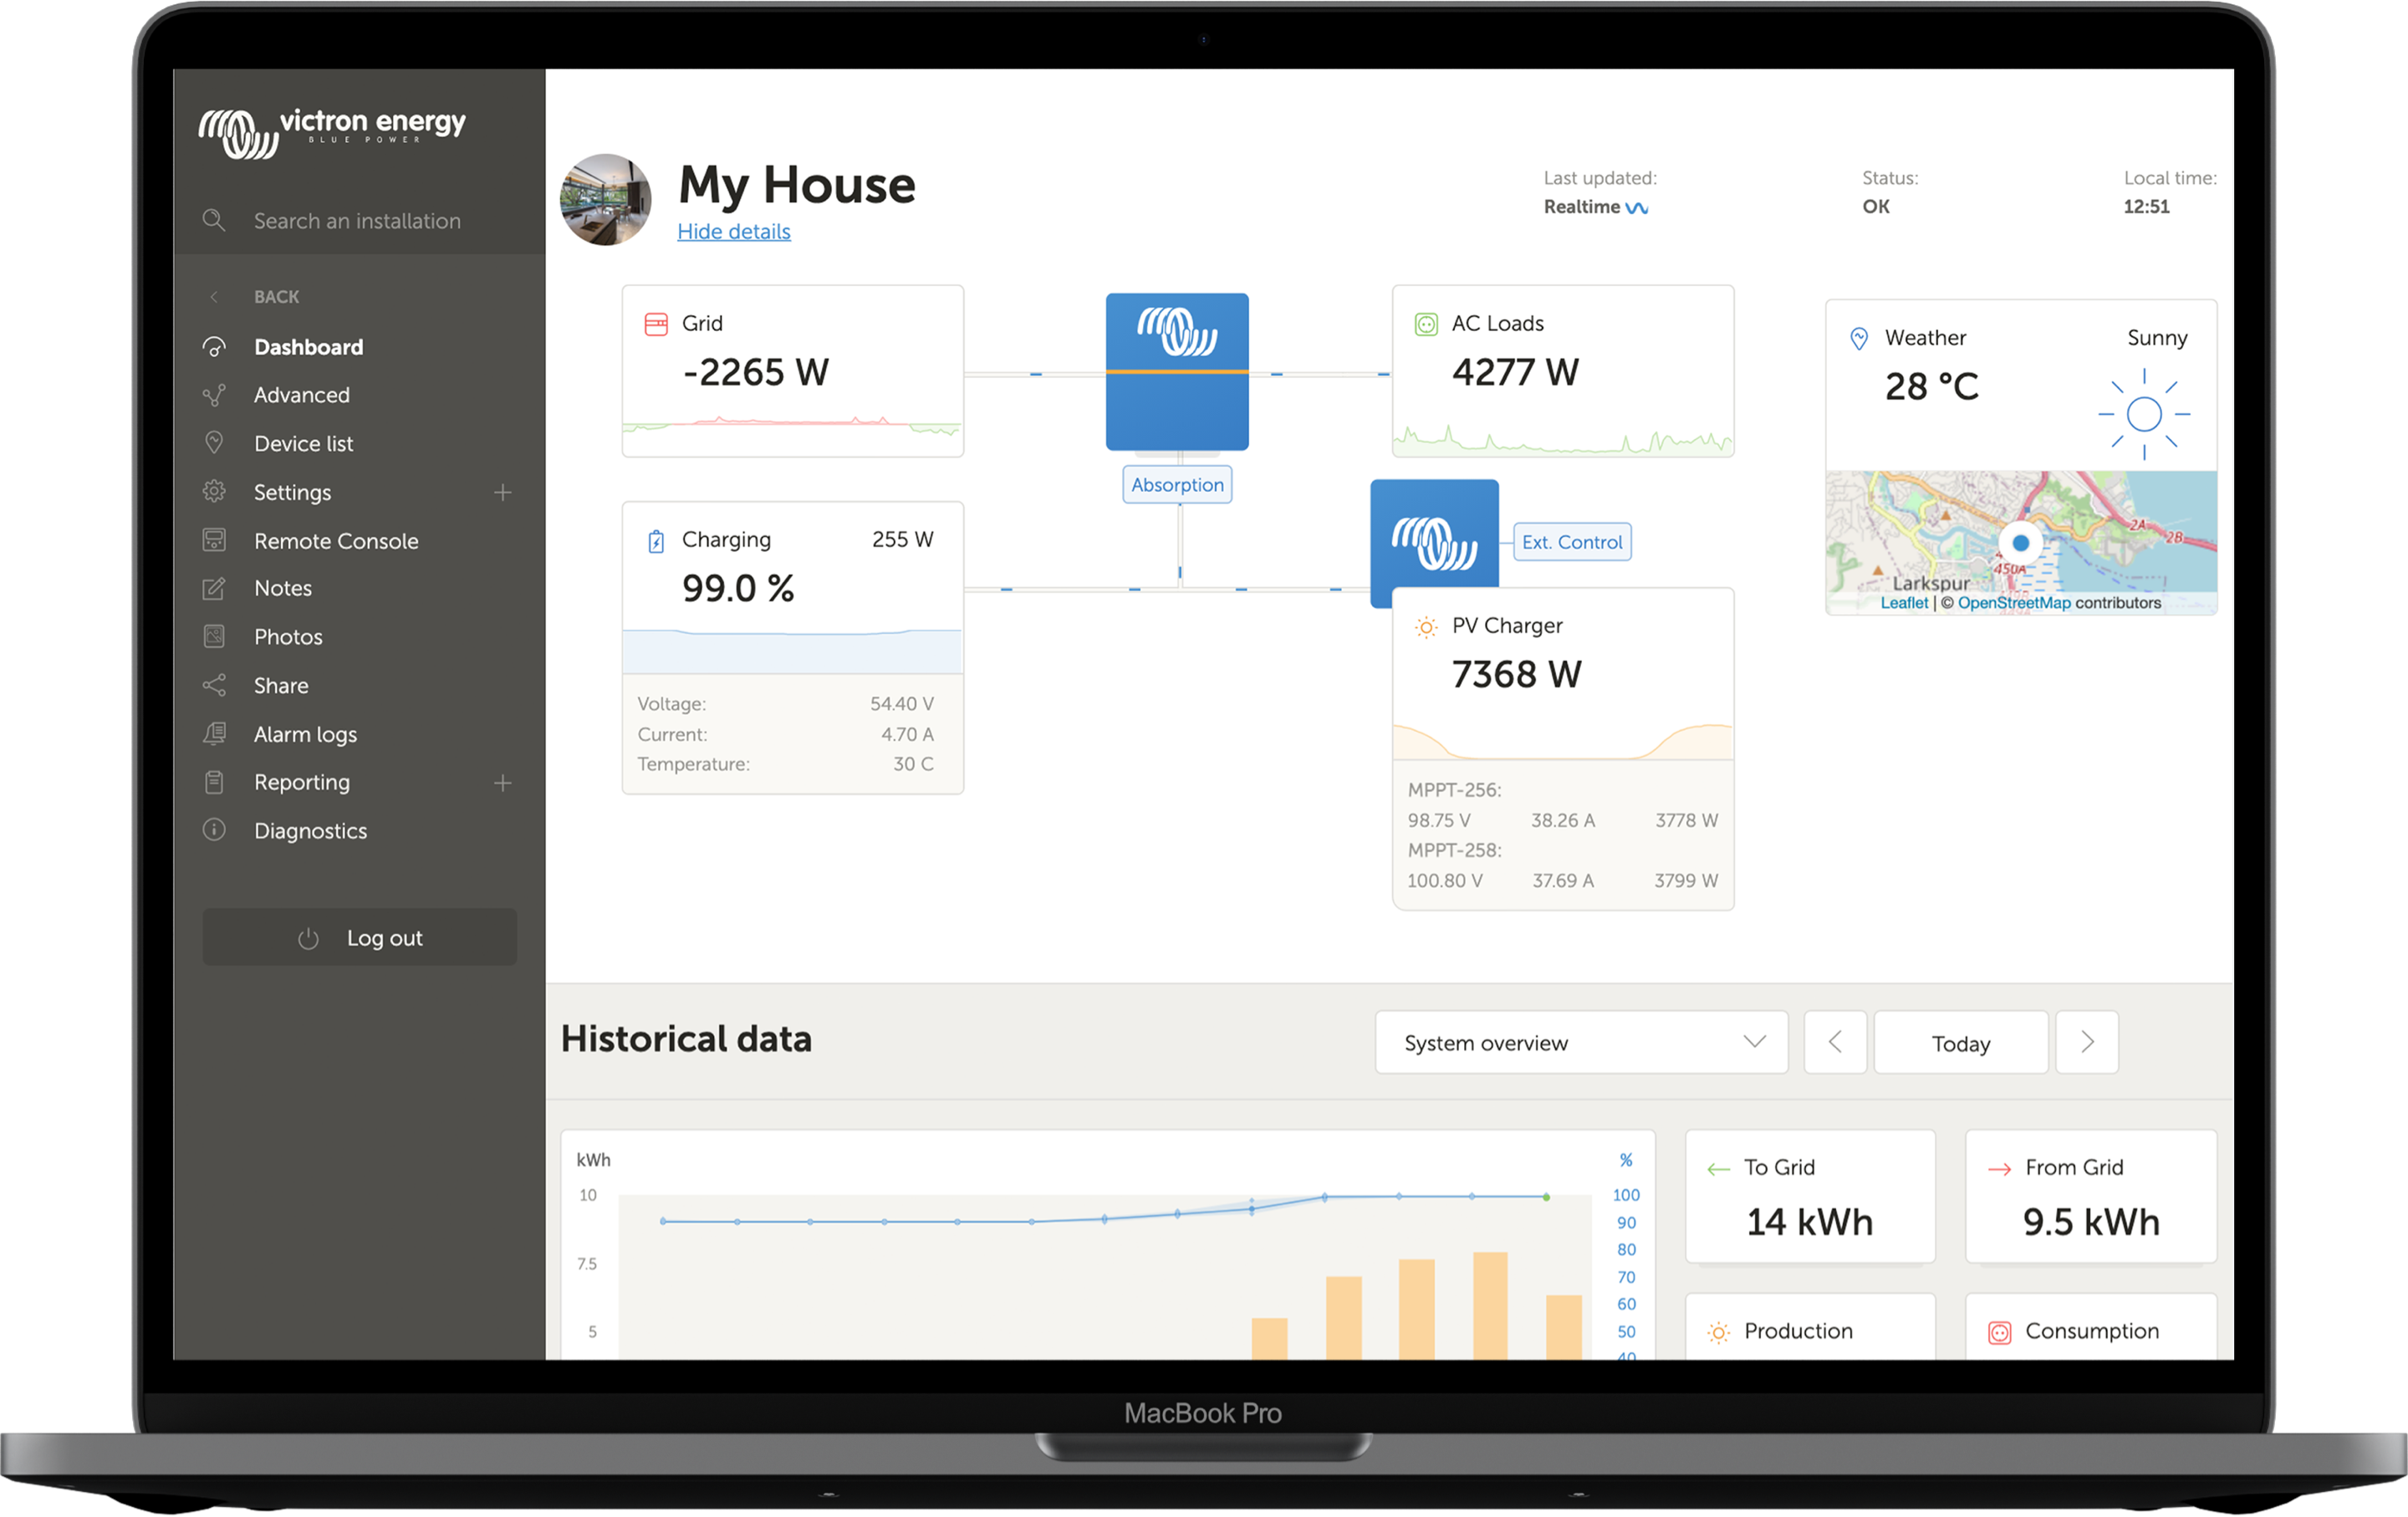 |
When connected to the internet, a GX device can be used in combination with the Victron Remote Management (VRM) portal, which enables:
Easy remote access to all statistics and systems status online
Remote Console on VRM: access and configure your system as if you were standing besides it
Remote Firmware update: Update the firmware of connected Solar Chargers and other Victron products
Remote VEConfigure: Download and upload Remote VEConfigure files from and to the Multi/Quattro connected to your GX device
Remote Controls: Control devices such as the EV Charging Station, Inverter/charger, GX relay, Genset and ESS system remotely via VRM
Use of the VRM App for iOS and Android including VRM APP Widgets on your mobile device's homescreen
See the Internet Connectivity chapter for how to connect the device to the internet.
For a complete overview of all features and functions of the VRM Portal, see the VRM Portal documentation.
12.2. Registering on VRM
Detailed instructions are in the VRM Portal Getting Started document.
Note that any system will need to first have been able to successfully send data to the VRM Portal. As long as there has been no successful connection, it will not be possible to register the system to your VRM user account. In such case, refer to below Troubleshooting data logging and Remote Console on VRM - Troubleshooting section.
12.3. Datalogging to VRM
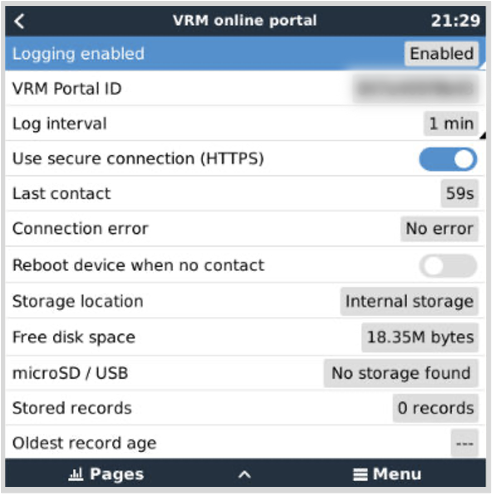
Datalogs are transmitted to the VRM Portal over the Internet, if available. All related settings are available in the VRM Online Portal menu (Device List → Settings → VRM online portal).
The transmission of the datalogs has been designed to work also on bad internet connections. Connections with up to 70% permanent packet loss are still enough to get the data out, albeit partially delayed.
Adding an external storage device
When unable to transmit the logs, then the GX device will store them to non-volatile storage (ie. data is not lost on a power loss or reboot).
The GX device has a buffer to store a couple of days worth of logs internally. To extend this period, insert a microSD card or USB stick. You can see the internal storage status in the settings.
Note that, when inserting such storage device, any internally stored logs will automatically be transferred to the inserted stick: no data is lost.
With or without an external storage device inserted, the GX device will always keep trying to connect to the portal and transmit all backlogged logs. That means that even with months worth of backlog, once it re-acquires an Internet connection, all of the backlog is sent out. The data is sent in a compressed manner: sending a lot of backlogged data will use considerably less bandwidth than than sending the data with a continuously available internet connection.
Storage device requirements
Supported file systems for MicroSD cards or USB flash drives are FAT (12, 16, 32), ext3, ext4 and exFAT.
SD and SDHC type microSD cards of 32 GB capacity and smaller are sold containing FAT12, FAT16 or FAT32. They can be used without a problem, unless they are subsequently re-formatted to an unsupported file system.
Manually transferring datalogs to VRM
For devices permanently without Internet, it is possible to take the data out, and then upload it manually from a laptop.
Go to Settings → VRM online portal, and click Eject the storage. Make sure to never just remove the SD-card/USB-stick, this can lead to corruption and data loss.
Remove the storage device and insert it into a computer or laptop that is connected to the internet.
Open a webbrowser, and navigate to the VRM Portal.
Login and then navigate to the Installations menu:
Click the 'Upload GX file' option and follow instructions:
Remove the file from the storage device and re-insert it into the GX device. Note that uploading the same data twice does not cause any problems; but still it is better not to do that.
With a log interval of once per minute, the required storage space roughly amounts to about 25 MB per month, depending on the number of connected products. So with a 1 GB microSD card, you can store about 3 years of backlog. In other words, any microSD card or USB stick should be sufficient to store the 6 months of data which VRM retains. When the storage device is full, no more data will be logged.
If multiple storage devices are inserted, the GX device will store the data on the one inserted first. When that is removed, it will not use the other one. Instead, it will create an internal backlog buffer. Only inserting a new one will make it switch to using external storage again.
Network watchdog: auto-reboot
This feature, disabled by default, makes the GX device automatically reboot itself in case it has not been able to connect to the VRM Portal.
12.4. Troubleshooting data logging
This chapter guides you through the troubleshooting that needs to be done when the GX device cannot transmit data to the VRM portal.
Initial check
First, check whether there is a connection between the GX device and the VRM portal and whether data is being sent or not.
Notice
Don't worry if the GX device has lost connection to the Internet for a short time. The data logs that were not transmitted during this time are temporarily stored in the GX device and will be transmitted once the Internet connection is restored.
Check the 'Last contact' entry in the menu of the VRM online portal (Settings → VRM online portal → Last contact).
If the displayed time is within the defined 'Log interval' setting in the same menu, this indicates that data is actively being sent to VRM, which means everything is working properly.
If it shows dashes, the GX device has been unable to contact the VRM Portal since it was powered up.
If it shows a time, but an error is shown, then the GX device has been able to send data, but has since lost contact.
If 'Logging enabled' is deactivated, then the GX device will not send any data to the VRM Portal.
Check the 'Stored records' entry in the same menu.
The 'Stored records' indicates the number of logs that it has stored to send later.
If this number is 0, it means that the Cerbo GX has sent all its data to the VRM Portal, which in turn means that the connection is actually working.
If this is larger than 0, it means that the Cerbo GX can not connect to the VRM Portal.
This is usually accompanied by an error message, which is described later in the chapter.
If you continue to have issues with data logging, please read on.
The communication required to send data logs to the VRM Portal is:
A good working internet connection - Preferably use a wired connection via Ethernet cable. Tethered or hotspot connections, e.g. with a cell phone, are unreliable and often interrupted or they do not automatically restore the connection after it was lost.
A proper IP address - Normally the router takes care of this and assigns the IP address to connected devices/computers automatically via DHCP as soon as you connect to them. A manual configuration is not necessary.
Outbound http(s) connection to http://ccgxlogging.victronenergy.com on port 80 and 443 - Note that should never be an issue, unless on very specialised company networks.
Note that the Cerbo GX does not support a proxy setup. For more details on the required networking, see the FAQ Q15: What type of networking is used by the Cerbo GX (TCP and UDP ports)?.
Troubleshooting steps
Update the GX device to the latest available firmware
See the Firmware updates chapter for details
Verify the network and internet connection
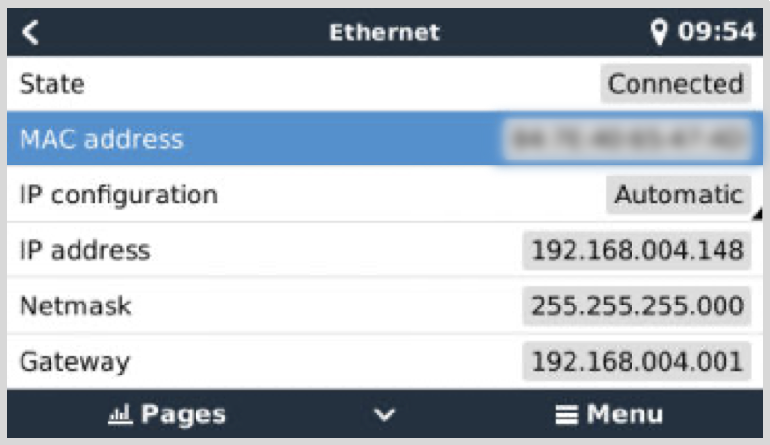
Check if the network router has automatically assigned an IP address to the GX device in the Ethernet or Wi-Fi menu (Settings → Ethernet → IP configuration → Automatic or Settings → Wi-Fi → Wi-Fi networks → [Your_connected_WiFi_network] → IP configuration → Automatic). This also applies to manually configured IP addresses. Make sure the following conditions are met:
State must be ‘Connected’
There must be an IP address that does not start with 169.
There must be a Netmask
There must be a Gateway
There must be a DNS server
For a GX GSM or GX LTE 4G , see the Troubleshooting guide in the GX LTE 4G manual.
If the IP address starts with 169, check whether your network has a DHCP server running. 99% of all networks have a DHCP server running, and it is enabled by default on all well-known ADSL, cable and 3G/4G routers. If there is no DHCP server running, then configure the IP address manually as described in the Manual IP configuration chapter.
Ethernet
When using Ethernet and 'State' shows 'Unplugged', verify that the Ethernet network cable is not faulty: try another one. The two lights at the back of the Cerbo GX, where the Ethernet RJ45 cable plugs in, should be lit or blinking. Two dead lights indicate a connection problem.
WiFi
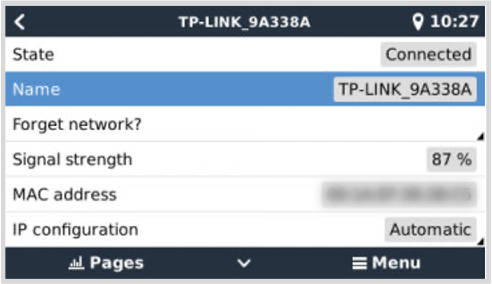
When using WiFi and the menu shows 'No WiFi adapter connected', check the USB connection to the WiFi dongle. Try to remove the dongle and insert it again.
When using WiFi and the 'State' shows 'Failure', it might be that the WiFi password is incorrect. Press 'Forget network' and try to connect again with the correct password.
Check the Connection error status
Navigate to Settings → VRM online portal and check the 'Connection error' status:
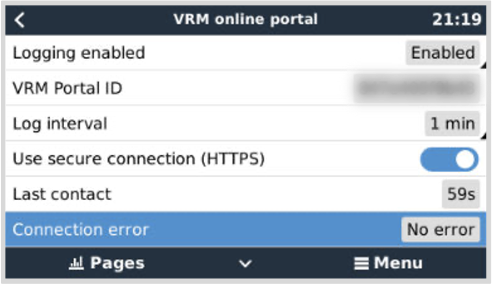
If a Connection error is shown, the Cerbo GX is not able to contact the VRM database. The connection error will show an error code that indicates the nature of the connectivity problem. Also, details of the error message are shown, to facilitate on-site IT experts to diagnose the problem.
Error #150 Unexpected response text: The http/https call succeeded, but the response was incorrect. This indicates that there is a WiFi or network login page, sometimes called a "captive portal", occasionally seen in Airports, Hotels, Marinas or RV campgrounds. There is no solution to make the GX device work with a WiFi network that requires such a login page and/or accepting of terms of use.
Error #151 Unexpected HTTP Response: A connection succeeded, but the response did not indicate a successful HTTP result code (normally 200). This might indicate that a transparent proxy is hijacking the connection. See #150 above for examples.
Error #152 Connection time-out: this could indicate a poor-quality internet connection or a restrictive firewall.
Error #153 Connection error: this could indicate a routing problem. For details, check the shown error message:
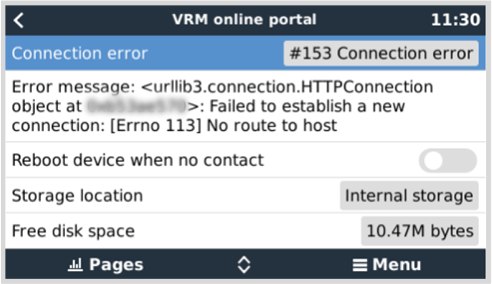
Error #153 Connection problem, and then specifically an SSL related issue, such as in below screenshot: check the date and time setting of the Gx Device, and also the time zone. And check that your router is not showing a special disclaimer, login or acceptance page, like often seen in airports, hotels and other public wifi.
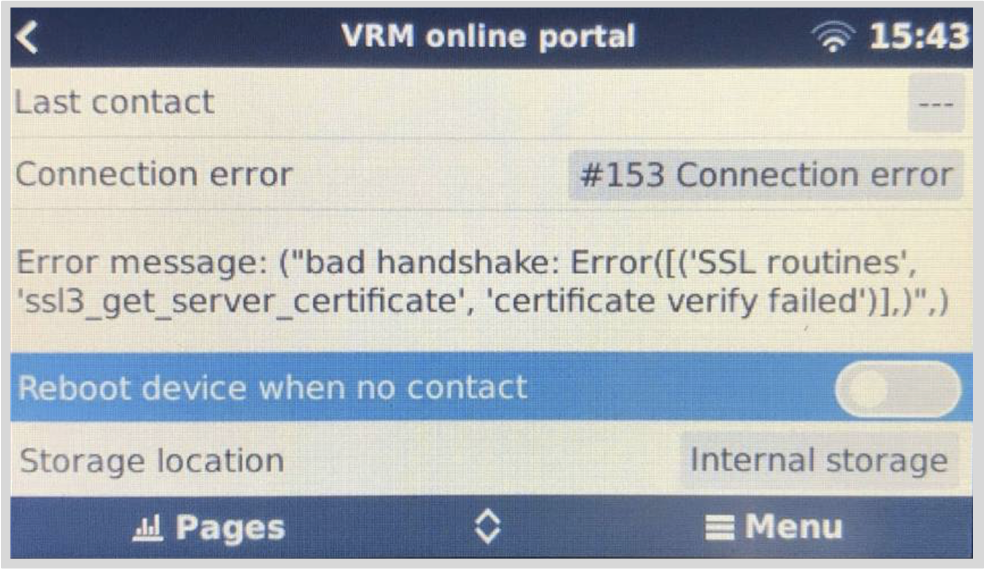
Error #154 DNS Failure: Make sure that a valid DNS server is configured in the Ethernet or WiFi menu. Typically this is assigned automatically by a DHCP server in a network.
Error #155 Routing error: VRM is unreachable. This error occurs if an ICMP error is received, indicating that no route exists to the VRM server. Make sure your DHCP server assigns a working default route, or that the gateway is correctly configured for static configurations.
Error #159 Unknown error: This is a catch-all error for errors that cannot be directly categorised. In such cases the error message will provide information about the problem.
12.5. Analysing data offline, without VRM
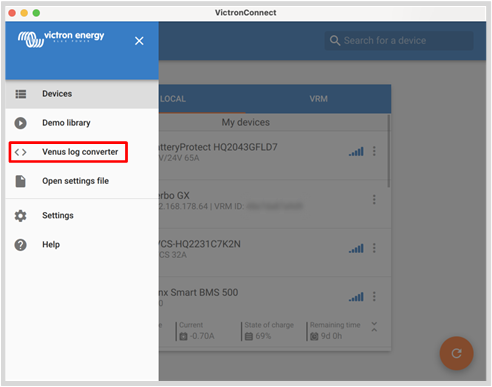
In certain cases, for example for very remote sites where there is no internet available, it can be useful to be able to analyse the data without first having to upload it to the VRM Portal.
Install VictronConnect on a Windows or Apple laptop
Insert the storage device containing the log file(s)
Open VictronConnect and use the Venus Log Converter feature to convert them to Excel sheets. Note that the Venus Log Converter is not available in the iOS and Android version of VictronConnect. See Importing and converting a GX Product Family database File for more details in the VictronConnect manual.
12.6. Remote Console on VRM - Setup
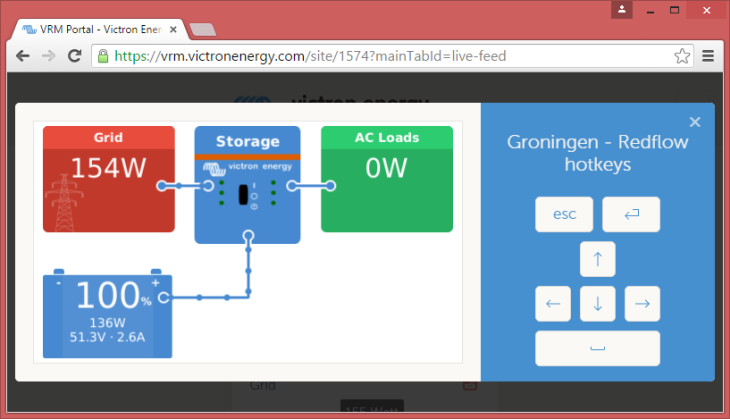
This feature allows full remote control of a GX device over the internet:
 |
The Remote Console on VRM is disabled by default. Activate it by following these steps:
Enable the feature in the Settings → Remote Console menu.
For details, see the The Remote Console menu chapter.
Either set a password or disable the password.
Restart the GX device.
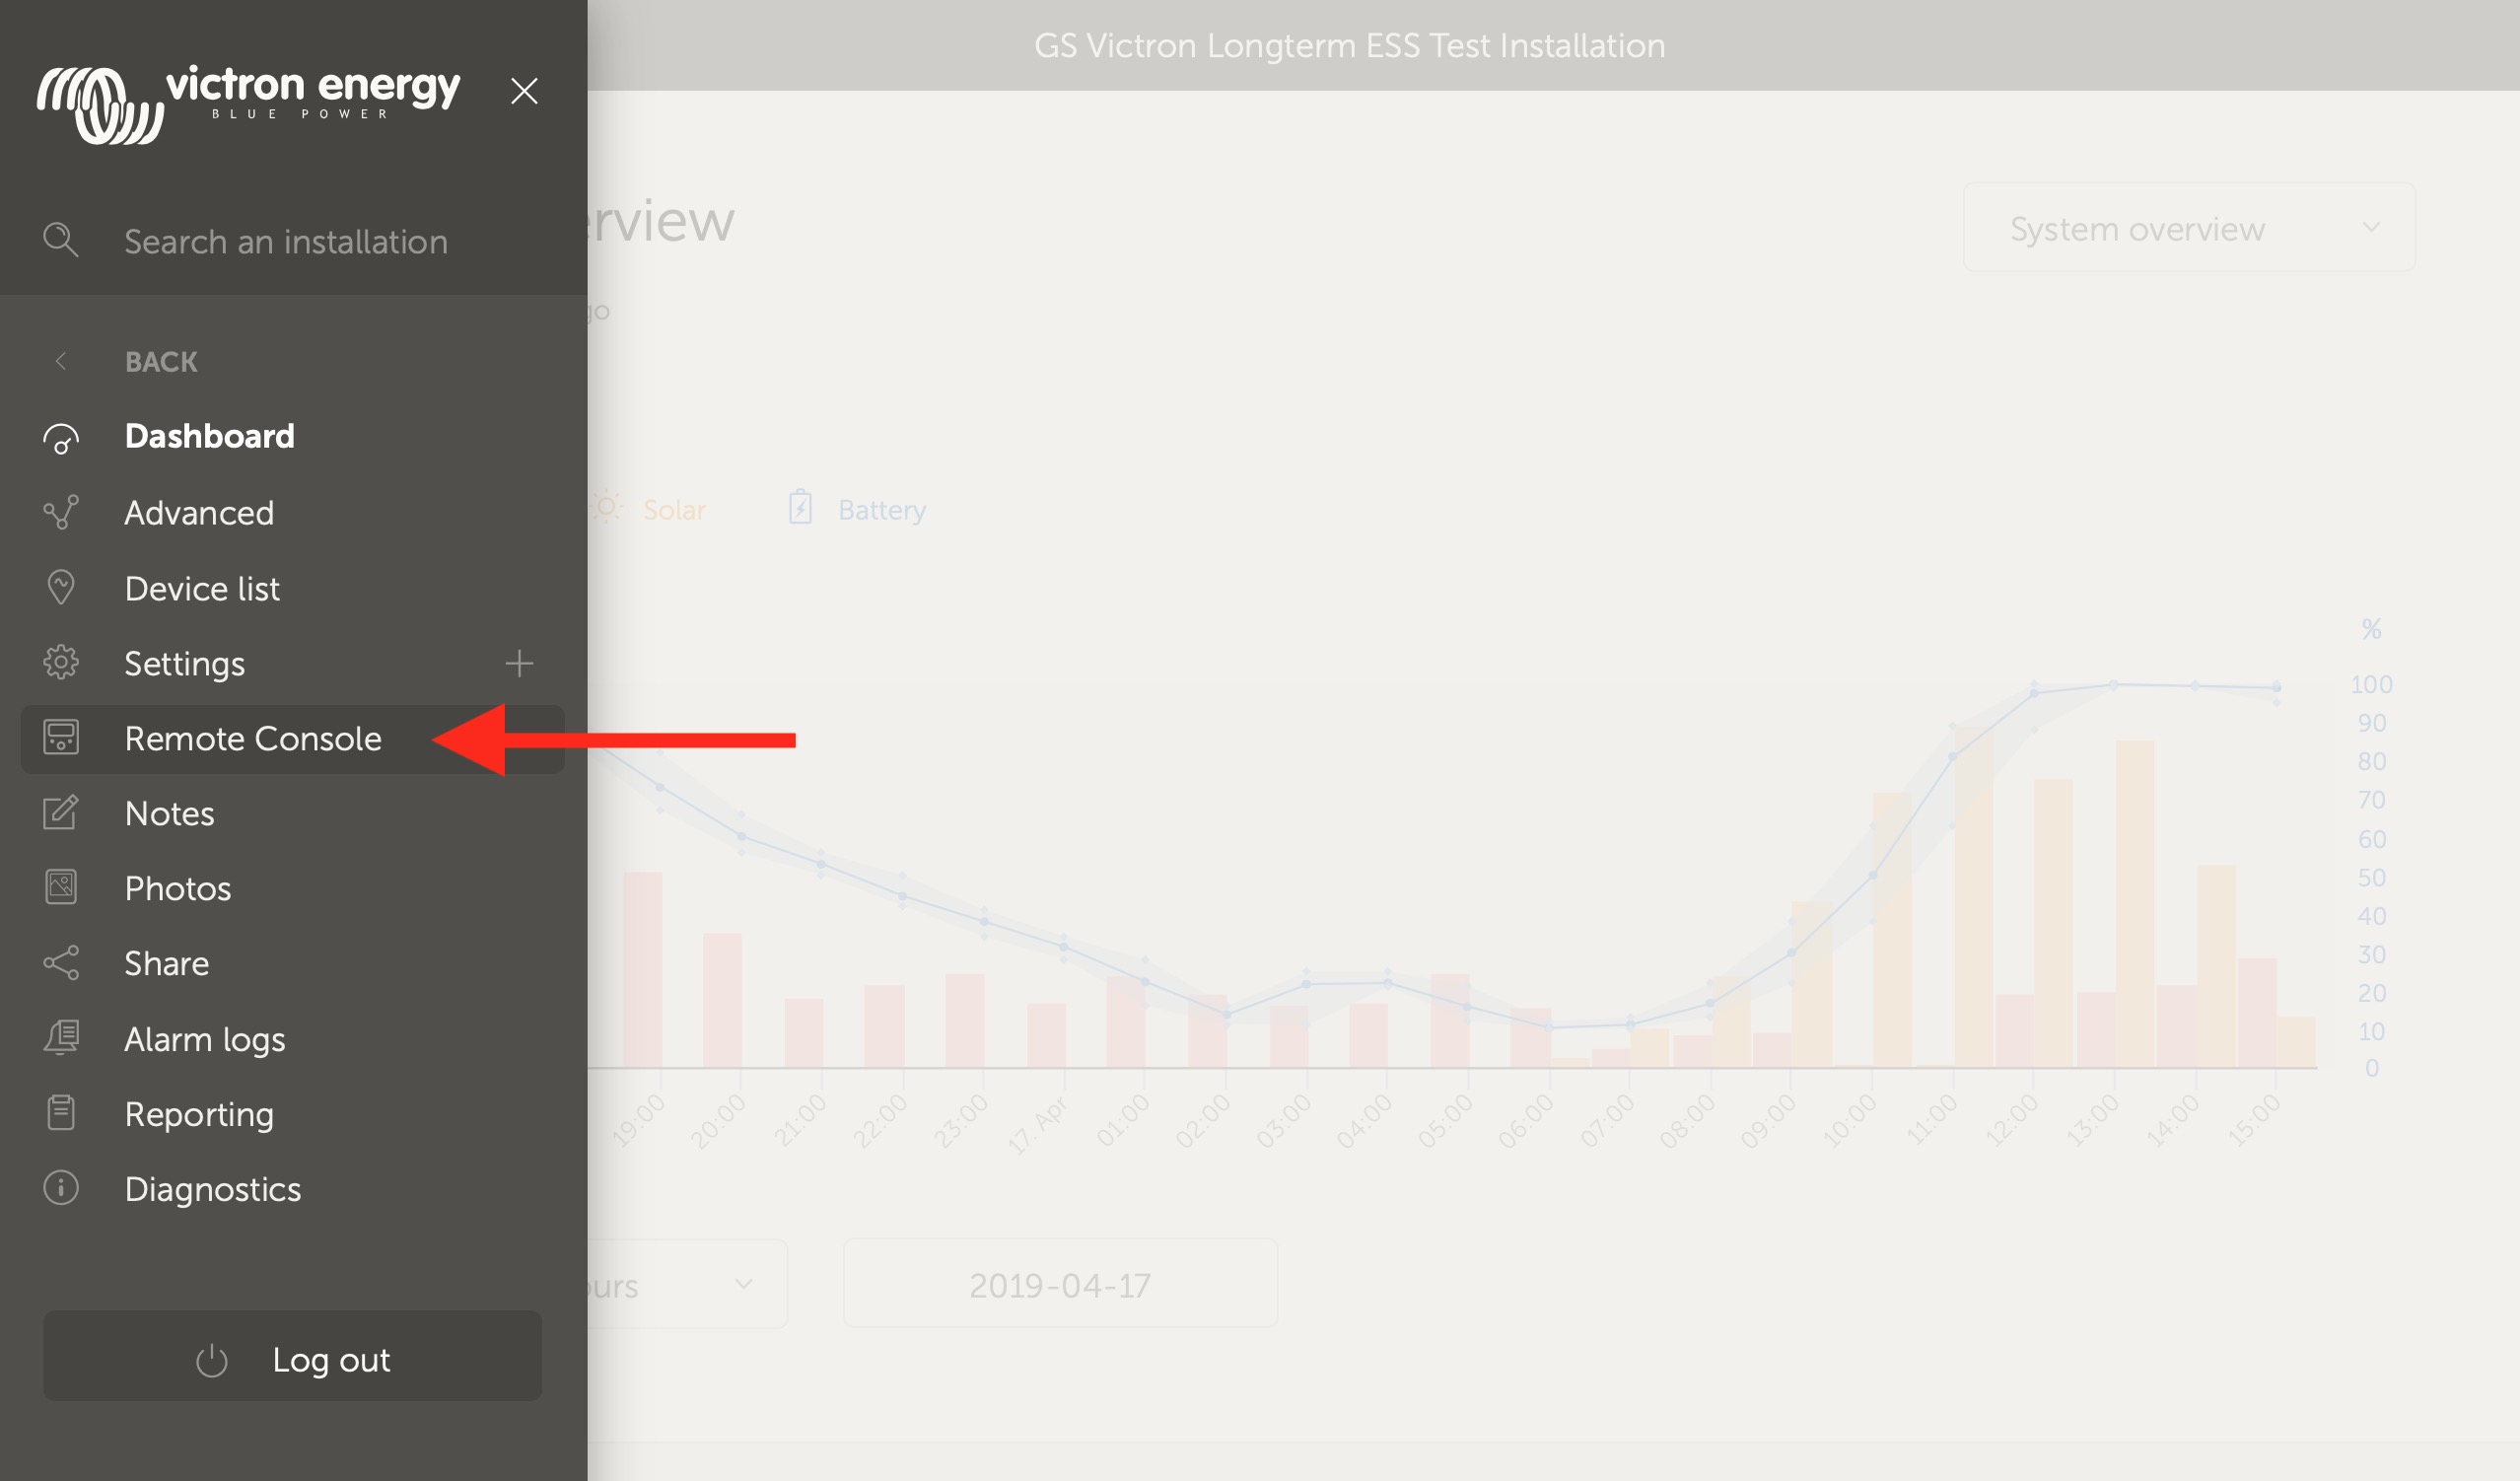
Now the Remote Console option will appear in the menu on the VRM Portal. Click it to open the Remote Console:
 |
12.7. Remote Console on VRM - Troubleshooting
Follow these steps to troubleshoot Remote Console on VRM:
Make sure that logging to the VRM portal works, see chapter Datalogging to VRM and Troubleshooting data logging. Without this; Remote Console on VRM will not work.
After enabling the Remote Console feature, make sure to set (or disable) the password.
Also make sure to restart the Cerbo GX after setting (or disabling) the password.
Make sure to update the Cerbo GX to the latest firmware version. The last stability improvement for Remote Console was made in version v2.30.
After the restart, check the Remote Console on VRM status shows online or a port number. In case it says offline, or port number 0, the Cerbo GX was unable to connect to the Remote Console server. This is normally caused by a (company) firewall, blocking the connection. The solution is then to configure an exception rule in the firewall.
Verify that your web browser, on which you're using VRM, can access both of below URLs. Click both of the links to check them. Note that seeing an Error means that all is OK. The good error is 'Error response, Error code 405, Method Not Allowed'. If you get a timeout or another (browser) error, there may be a firewall blocking the connection. https://vncrelay.victronenergy.com & https://vncrelay2.victronenergy.com/
Technical background
To have Remote Console on VRM working, your web browser and the GX device need to have a connection between them. This connection is designed such that it doesn't need any special configuration or opening up of firewalls in almost all situations. The 0.1% of situations where it doesn't work out of the box are, for example, large corporate networks with special security, or long range expensive satellite or radio supported networks, such as seen in rural areas of Africa and other remote areas.
When Remote Console on VRM is enabled, the GX device will open and maintain a connection to any of the servers pointed to by supporthosts.victronenergy.com. Which currently resolves to multiple IP addresses (84.22.108.49, 84.22.107.120, 3.25.10.245, 13.244.154.199 or 35.165.124.40, depending on where you are), and likely more in the future. The technology used is SSH, and it will try to connect using port 22, 80 and 443, only one of them needs to work. The reason for it to try all three is that on most networks at least one of them will be allowed by the local firewall.
Once connected to one of the supporthost servers, that reverse SSH tunnel is waiting to be connected from someone needing the connection. Which can be your browser, or a Victron engineer since this same technology is used for the Remote Support functionality; for more information see above.
When using Remote Console on VRM, the browser will connect to either vncrelay.victronenergy.com, or vncrelay2.victronenergy.com, using websockets on port 443. For more details of used connections by the GX device, see Q15 of the FAQ.